Because it integrates with other Microsoft 365 applications, Microsoft OneNote is an excellent tool for managing meeting notes or minutes. Let’s look at three ways to capture and share meeting notes in OneNote. (Continue reading or watch this step-by-step video.)
1. Adding Meeting Details into OneNote
If you have a scheduled meeting in Microsoft Teams or Outlook, you can give your notes a more consistent appearance and provide a more complete record of your meetings by adding meeting details into OneNote.
To add Outlook meeting details to OneNote:
- In OneNote, move to the section where you want to add the meeting notes.
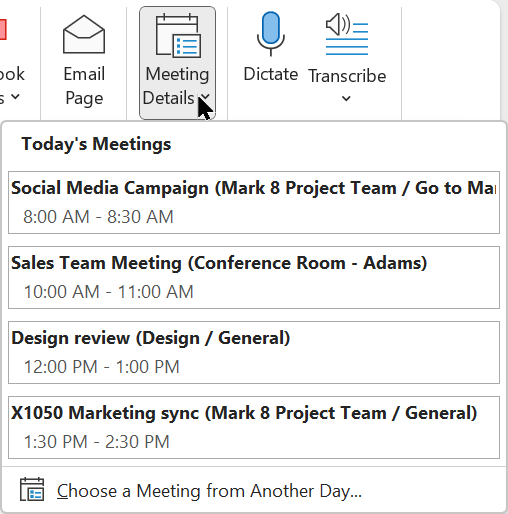
- Next, choose Home > Meeting Details.
- From the menu, do one of the following:
• To select a meeting that occurs today, choose its time and subject from the list.
• To select a meeting on a different day, select Choose a Meeting from Another Day and then choose the calendar icon to choose a specific date or click the Previous Day or Next Day buttons to display a past or future meeting. - Pick the time and subject of the meeting you want, and then choose Insert Details.
By default, the meeting details will be inserted as text on a new page in OneNote. The meeting details can include the date and location, agenda, topic, and attendees.
You can freely add to, change, or delete any part of the meeting details in OneNote without affecting the original meeting notice in your Outlook or Teams calendar. For example, you can delete the names of invited attendees who weren’t at the meeting, so you have a record of who attended. Another option is to use the checkboxes in front of each attendee to select the people who participated in the meeting.
2. Create Meeting Notes from a OneNote Template
Another option for capturing meeting notes in OneNote is to start with a built-in template for the OneNote page.
- Move to the OneNote section where you want to add the meeting notes.
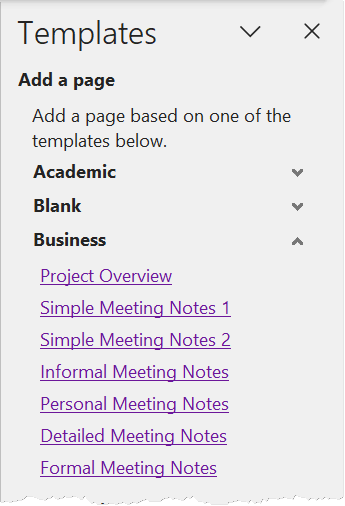
- Next, choose Insert > Page Templates.
- There are lots of options here for your OneNote pages. For example, select the Business category and choose from templates for meeting notes, such as Simple Meeting Notes 2 or Project Overview. Each choice creates a new page in OneNote.
- Now you can add your notes or even insert meeting details from a scheduled meeting using the steps above.
3. Share Notes in an Email or to a Teams Channel
Whether you’ve created meeting notes or minutes manually or using one of the options above, in OneNote, it’s easy to share your notes with other participants.
To send a page of notes in the body of an email:
- Open the page of meeting notes you would like to send by email.
- In OneNote, pick Home > Email Page or press [Ctrl] + [Shift] + E, and the contents of the page will be inserted into a new email message.
- Add the recipient, subject, etc., and send the email.
Another option for sharing a OneNote page is to pick File > Send.
To send a page of notes to a Teams channel:
- Create an email using one of the options in OneNote to email a page.
- To get the email address for a Teams channel, click the … (More Options) in the upper-right corner and pick Get email address.
- Copy the email address and paste it into the email with the meeting notes and send the email as usual.
- Your notes will be displayed as a post in the Teams channel.
How will you use OneNote to save time creating and managing your meeting notes?
Find other time-saving Microsoft OneNote shortcuts, tips and tricks at TheSoftwarePro.com/OneNote.
© Dawn Bjork, MCT, MOSE, CSP®, The Software Pro®
Microsoft Certified Trainer, Productivity Speaker, Certified Speaking Professional