When you need more customized graphics than what you can create with the time-saving Microsoft 365 SmartArt graphics feature, you can easily add shapes, such as boxes, circles, and arrows, to your PowerPoint slides.
In this article, you’ll learn how to quickly apply shortcuts and tips for working with shapes in PowerPoint. Or, watch this video to see these tricks in action:
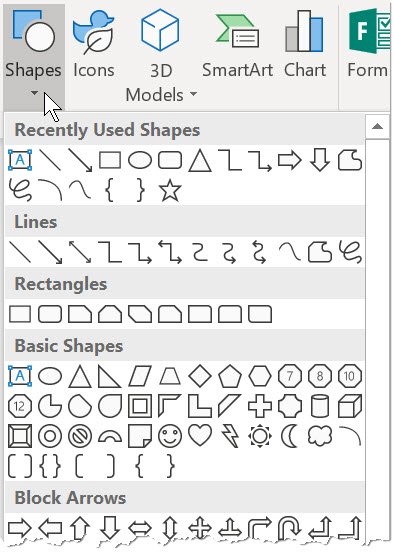 To add a shape, click Insert, click Shapes, select a shape, and then click and drag to draw the shape. After you add one or more shapes, you can add text, bullets, and numbering to them, and you can change their fill, outline, and other effects on the contextual Format tab.
Bonus Tip: These options for creating and formatting shapes also work in other Microsoft 365 programs, including Word, Excel, and Outlook.
Creating the Perfect Circle, Square, Star, and More
If you have even tried to draw a circle or square on a slide, you might have noticed that the tool is actually called an ellipse or rectangle, which does not automatically give you a perfectly proportional shape.
The next time that you want an evenly proportioned shape, pick Insert > Shapes pick the option you want, and then press and hold down [Shift] while dragging your mouse to draw the object. Release the mouse before letting go of the [Shift] key, and you will have a perfect circle (or square). Hold [Shift] again if you need to re-size the shape.
This trick can also be used for drawing other shapes, including stars, octagons, triangles, and more.
Tips to Quickly Copy a Shape
Do you want more copies of your shape? Here’s an easy way to make a copy:
- Click once on the shape to select and then try one of these options to copy:
– Press [Ctrl] + D to duplicate, OR
– Press and hold down [Ctrl] while dragging the original object to create a copy in a new location.
Easy Alignment Trick
If you want the original and the copy to be evenly aligned either horizontally or vertically, follow the steps to copy above using [Ctrl] but also add the [Shift] key, which will “constrain” or limit your movement to only across or up and down.
Use Lock Drawing Mode to Duplicate
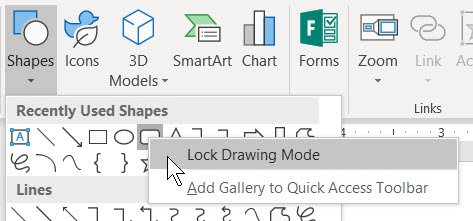 Another easy way to create multiple copies of a shape is to use the Lock Drawing Mode. After choosing Insert > Shapes, right-click on the shape you want to create multiple times and then select Lock Drawing Mode. Next, click or click and drag to create a shape as many times as you want. Press [Esc] to turn off this mode. The previous copy options, including [Ctrl] + D to duplicate, are better choices if you have applied custom formatting to the original shape.
Tips for Formatting Shapes
Limit Your Lines in PowerPoint Shapes
Most shapes will look more professional onscreen without an outside line or border.
To remove the line from a shape:
- Select the shape that displays the contextual Format Ribbon tab.
- Choose the Shape Fill drop-down from the Shape Styles group.
- Pick No Outline.
Easy Formatting for Shapes with Quick Styles
Quick Styles let you apply a style to your shape with one click.
- Click the shape you want to change.
- Select the Format tab, and in the Shape Styles group, select the Quick Style you want to use from the Quick Styles gallery (click the More drop-down arrow for additional styles).
- When you rest your pointer over a Quick Style thumbnail, you can see how the style affects your shape. Click once to pick the style you want to apply to the selected shape.
Tips for Selecting Objects
Selecting Multiple Objects
To select or highlight more than one shape, press and hold down the [Shift] key and click on each object. Click again if you want to unselect an object. All highlighted objects can then be moved, copied, formatted, and modified together. Click away from the selected items to unselect them all.
Selecting “Hidden” Objects
With more complex slides, a shape, text box, or other objects that you want to work with may be hidden or tucked behind other objects, making it difficult to click and select the correct one. To select slide objects in sequence, press [Tab] repeatedly. Each object, including titles and subtitles, will be individually highlighted each time you press [Tab]. Stop on the one you want to work with. Go backwards by pressing [Shift] + [Tab].
Next, format, delete, copy, move, or resize the selected object.
Were these tips for PowerPoint shapes and objects helpful? Discover more PowerPoint tips, techniques, and shortcuts here.
© Dawn Bjork, MCT, MOSE, CSP®, The Software Pro®
Microsoft Certified Trainer, Productivity Speaker, Certified Speaking Professional