Quick Overview:
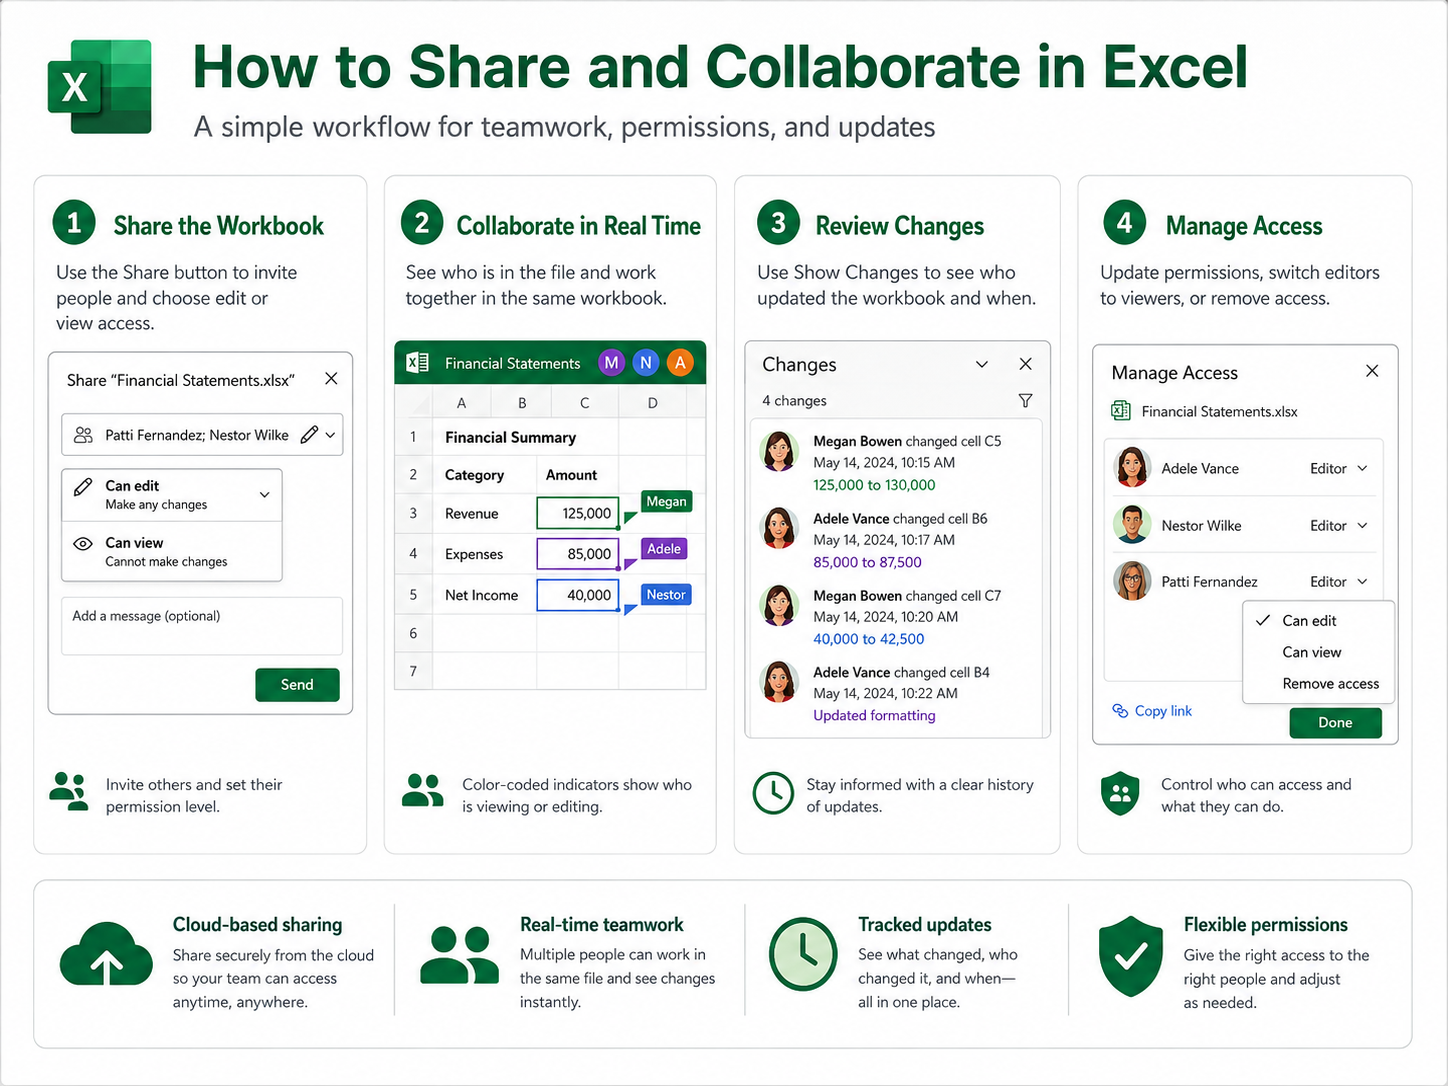
Sharing an Excel workbook through OneDrive or SharePoint allows multiple people to work in the same file without creating separate copies. You can choose who can edit or view the workbook, collaborate in real time, review updates, and adjust sharing permissions whenever needed.In this article, you will learn how to:
- Share an Excel workbook with others
- Control whether someone can edit or only view the file
- Collaborate in real time
- Review changes made by others
- Manage or remove shared access
Have you ever needed to share an Excel workbook but weren’t sure of the best way to do it?
 Microsoft Excel makes it easy to share a workbook with coworkers, clients, or project team members. You can control who can edit the file, collaborate with others in real time, review changes, and update access as a project evolves.
To learn more about sharing and collaborating in an Excel workbook, continue reading for step-by-step instructions or watch my video for a complete demonstration.
Save the Workbook to OneDrive or SharePoint
Before you can collaborate with others, the workbook needs to be saved to OneDrive or SharePoint.
Saving the file in the cloud allows multiple people to work in the same workbook, sometimes at the same time. It also gives you access to sharing permissions, AutoSave, and tools for reviewing changes.
If you work in a business environment, your files may be stored in SharePoint rather than OneDrive. Fortunately, the sharing experience is very similar.
Learn more about storing, accessing, and sharing your files in my article, What Is Microsoft OneDrive?
How to Share an Excel Workbook
To share a workbook from Excel:
 Open the workbook you want to share.
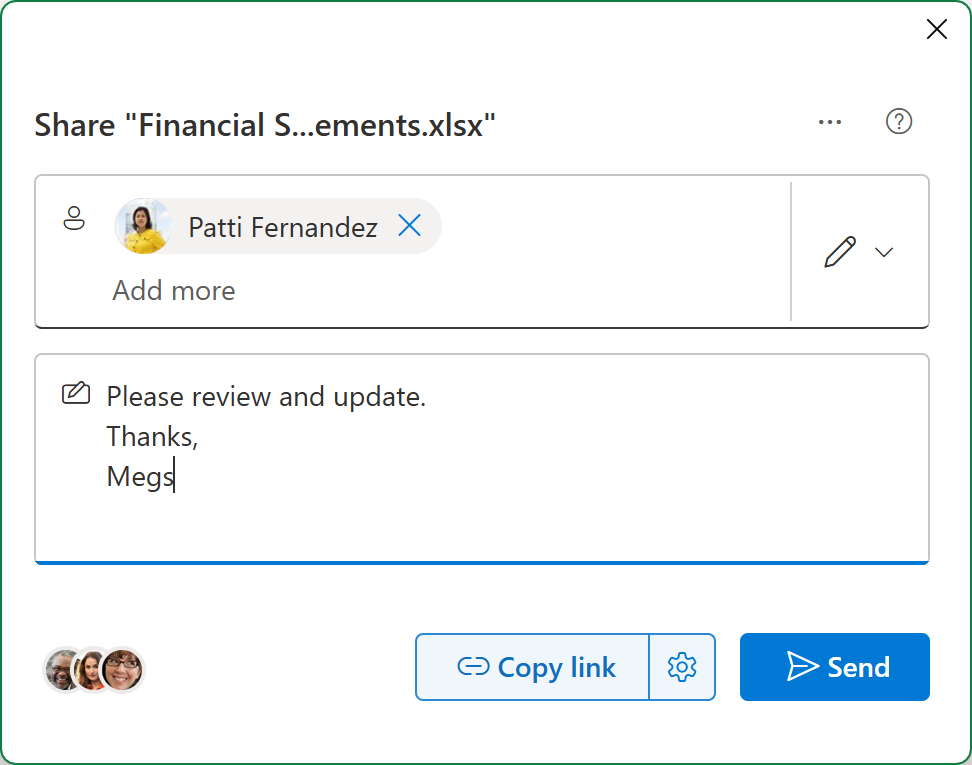
- Select the Share button in the upper-right corner.
- Enter the name, group, or email address of the people you want to invite.
- Review the sharing permissions and choose whether recipients can edit or only view the workbook.
- Depending on your organization’s settings, you may also be able to control downloading, set an expiration date, or add a password.
- Add an optional message.
- Select Send.
The recipients will receive an email invitation with a link to the workbook.
Good to Know: When you share a workbook, recipients receive access only to that specific file. They do not receive access to your entire OneDrive.
Create a Sharing Link
Instead of sending an invitation directly from Excel, you can create a sharing link and paste it into an email, Microsoft Teams conversation, or chat message.
Before copying the link, review the settings to confirm who can use it and whether they can edit or only view the workbook. The available options may vary depending on your organization’s Microsoft 365 settings.
Collaborate in Real Time
Once the workbook has been shared, multiple people can work in the same file. Microsoft often refers to this as co-authoring, which simply means that several people can edit and contribute to the workbook.
Excel shows when someone else is currently working in the workbook. You may see the person’s profile icon at the top of the window, along with an indication of where they are working.
As changes are made, they appear in the workbook. This makes it easier for team members to work together without creating and emailing multiple copies of the same file.
Not everyone needs to work on the same worksheet or edit the workbook at the same time. Different people can work in various parts of the workbook while still contributing to the same file.
Use AutoSave to Keep Changes Current
Files saved in OneDrive or SharePoint typically have AutoSave enabled. Your changes are continuously saved as you work, although you can still save the workbook manually.
AutoSave is especially helpful when several people are working in the same workbook because everyone can see the most current version of the file.
Find Workbooks Shared With You
Excel provides several ways to find files that other people have shared with you.
From the Excel desktop app, open the File tab and select Shared with Me. You can also access shared files directly from OneDrive.
This makes it easier to return to a workbook that someone else owns without searching through previous emails or messages.
Review Changes Made by Others
One common concern about sharing workbooks is keeping track of changes. Excel includes a Show Changes feature that makes it easier to review updates.
To review changes:
- Open the workbook.
- Select the Review
- Choose Show Changes.
The Show Changes pane appears on the right side of the screen. It can display:
- Who made the change
- What information was updated
- When the change occurred
You can also filter changes by worksheet.
Formatting changes may not always appear in the Show Changes pane, but edits to workbook data are tracked. This makes it easier to monitor important updates without reviewing every cell manually.
The Show Changes feature is available in both the Excel desktop app and Excel for the web.
Manage Access to a Shared Workbook
As projects change, you may need to update sharing permissions or remove someone’s access.
To manage access:
- Open the workbook.
- Select the Share button.
- Choose Manage Access.
- Review the people and links that currently have access.
From the Manage Access pane, you can:
- Change someone from an editor to a viewer
- Remove an individual’s access
- Update sharing links
- Stop sharing the workbook altogether
As the file owner, you can review and change permissions at any time.
For example, if someone is no longer involved in the project, you can remove their access. If another person still needs to see the workbook but should no longer make changes, you can switch their permission from editor to viewer.
Work More Effectively with Shared Excel Workbooks
Sharing an Excel workbook gives everyone access to the same file, helping you avoid the confusion of emailing multiple versions back and forth. Your team can work together, see updates as they happen, review changes, and manage permissions as needs change.
With these sharing and collaboration tools, you can work more efficiently with coworkers, clients, and project teams while keeping the workbook organized and access under control.
For more Microsoft Excel tips, tutorials, and resources, visit TheSoftwarePro.com/Excel.
© Dawn Bjork, MCT, MOSE, CSP®, The Software Pro®
Microsoft Certified Trainer, Productivity Speaker, Certified Speaking Professional