Sometimes, text in Word doesn’t display in the correct case. This is especially common when text is imported from other sources or created by someone else. For instance, the text is in ALL CAPS when you’d like to show the text as Sentence case instead.
So, what are your choices for changing the case of text in Word? Like many Word features, change case options are available in a number of ways—through a keyboard shortcut, the Ribbon, and a dialog box. With these choices, you can quickly change the case of existing text. Let’s look at these options (or watch the video below).
#1: Change Case with a Keyboard Shortcut
To change text using a keyboard shortcut:
- Highlight the selected text and press [Shift]+F3.
- Press this shortcut again to toggle around three different case options:
• All uppercase
• All lowercase
• Sentence case
#2: Using the Ribbon to Change the Case of Text
To change the case of text with Ribbon options:
- Next, pick the Change Case button on the Font group of the Home tab on the Ribbon.
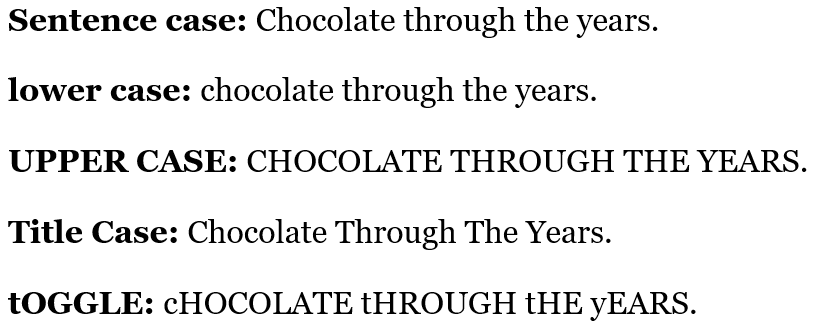
- From the dropdown menu, pick from 5 different options:
• Sentence case
• lowercase
• UPPERCASE
• Capitalize Each Word (Title Case)
• tOGGLE; reverse the case of the selected text
#3: Case Tricks with the Font Dialog Box
Finally, two other change case choices are hiding in the Font Dialog Box. These are a bit different than the previous examples.
To change the case and look of text with the Font dialog box:
- Once again, select the text you want to change.
- From the Home tab, move to the Font group and open the Font dialog box from the dialog launcher (little arrow/icon) in the bottom-right corner.
-OR-
Press [Ctrl]+[Shift]+F to open the Font dialog box. - Notice these two capitalization options.
• Small caps: All letters will be capitalized, but letters that are already lowercase will be slightly smaller.
• All caps: All letters will be capitalized. This is the same as if UPPERCASE was selected using one of the previous methods. - Select the option you want and close the dialog box.
However, it’s good to know that these two CAPS options are different from the other change case options because they change the look of the letters but not the underlying case of the text. So, if this font option is removed, the text reverts back to its previous appearance. These font choices are also handy for Word styles when applying a specific appearance and formatting to your text.
Which of these choices will be helpful to you when you want to change the case of your text in Microsoft Word?
Discover more ways to save time editing and formatting your Word documents at TheSoftwarePro.com/Word.
© Dawn Bjork, MCT, MOSE, CSP®, The Software Pro®
Microsoft Certified Trainer, Productivity Speaker, Certified Speaking Professional